
To improve sound quality on a low budget, focus on microphone placement by keeping it close to the source and at the right level. Control ambient noise by choosing quiet spaces, using DIY dampening materials, and turning off noise sources. Use directional mics and basic accessories like pop filters to improve clarity. Experiment with different setups and environments, and consider post-production filters for cleaner audio. Continue exploring these tips to get the best results with limited gear.
Key Takeaways
- Use close-mic placement and directional microphones to improve clarity and reduce ambient noise.
- Record in small, quiet spaces with soft surfaces to dampen echo and reverb.
- Incorporate DIY soundproofing materials like blankets and curtains to enhance acoustics.
- Employ pop filters and foam windscreens to minimize pops and hissing sounds.
- Utilize AI-based noise reduction tools during post-production to clean up recordings cost-effectively.
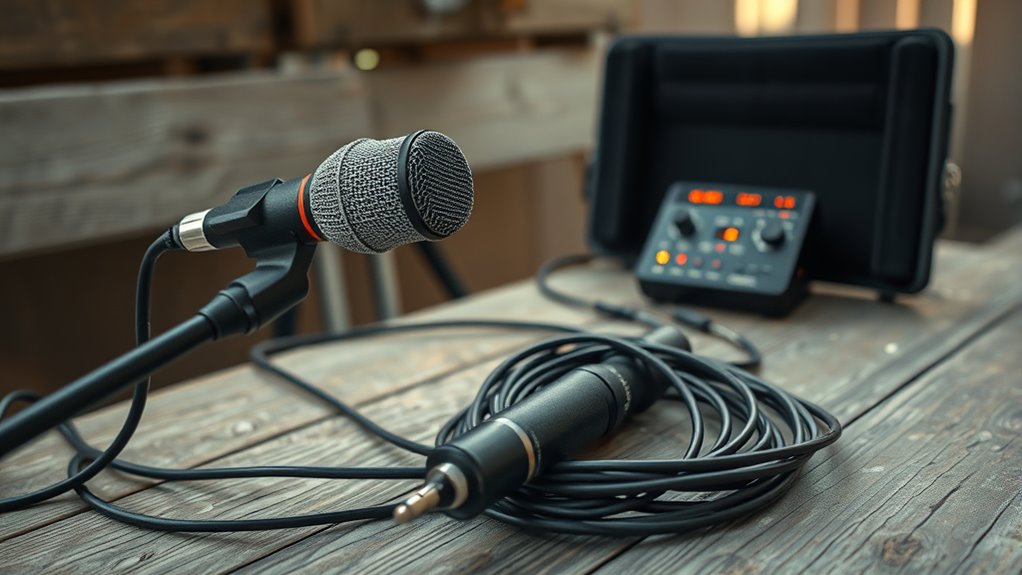
Ever wondered how to capture crystal-clear sound recordings? It all starts with smart microphone placement. You don’t need expensive gear to get good audio; instead, focus on where you position your microphone. Place it as close as possible to your sound source without causing distortion or unwanted noise. For vocals, keep the microphone at mouth level, slightly off to the side to avoid plosive sounds. When recording instruments, position the mic directly in front of the sound source, aiming for the best balance of clarity and depth. Remember, the closer your microphone is, the more prominent the sound source will be, and the less ambient noise you’ll pick up. This simple step can dramatically improve your recording quality, especially when working with limited equipment.
Proper microphone placement enhances audio clarity and reduces noise without expensive gear.
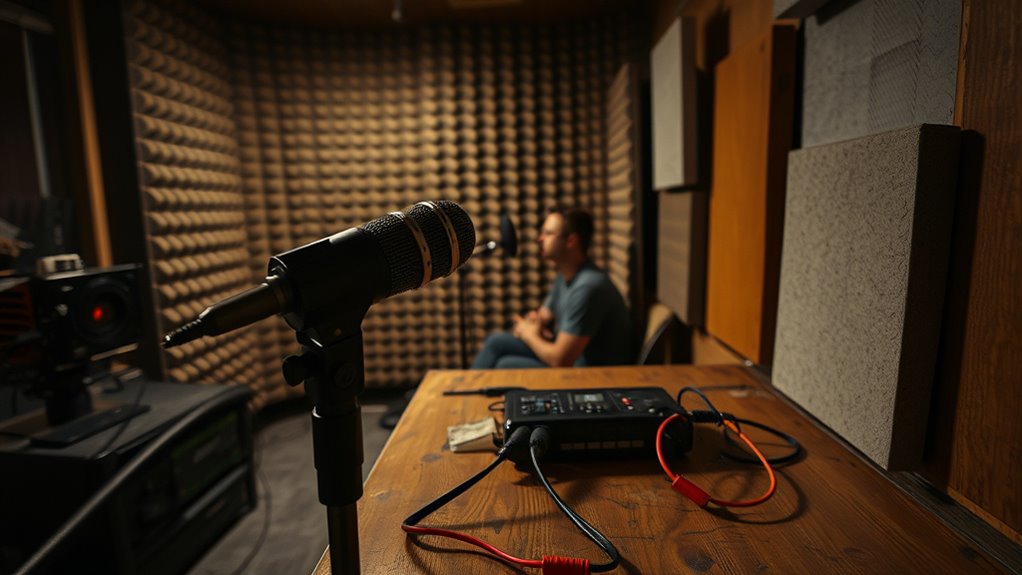
Ambient noise control is equally important, especially when you’re on a tight budget. Open windows or doors can let in unwanted sounds like traffic or people talking, so try to choose a quiet space for recording. Use blankets, curtains, or even DIY soundproofing materials to dampen echo and reduce background noise. If you’re recording in a noisy environment, consider using directional microphones, such as cardioid or shotgun mics, which naturally help reject sounds coming from behind or the sides. Positioning the microphone away from noise sources and towards your sound source helps isolate the audio you want to capture. Additionally, turning off fans, air conditioners, or other appliances during recording sessions can make a significant difference.
A further tip is to utilize smart technology, like AI-based noise reduction tools, which can help clean up your recordings during post-production. Another trick is to use your environment to your advantage. If you’re recording vocals or acoustic instruments, try to find a small, quiet room with soft surfaces that absorb sound reflections. This reduces reverb and makes your recordings clearer. For outdoor recordings, look for sheltered spots that block wind and reduce environmental noise. Using a pop filter or foam windscreen can also cut down on pops and hissing sounds, giving you cleaner audio without investing in expensive accessories.
Ultimately, good microphone placement and ambient noise control are your best friends when working with a low budget. You don’t need a fancy studio to get professional-sounding recordings—just a bit of strategic positioning and environment management. Keep experimenting with different placements and setups to find what works best in your space. With patience and attention to detail, you can achieve clear, high-quality sound recordings without breaking the bank.
budget shotgun microphone
As an affiliate, we earn on qualifying purchases.
As an affiliate, we earn on qualifying purchases.
Frequently Asked Questions
How Can I Improve Sound Quality Without Expensive Equipment?
You can improve sound quality by paying close attention to microphone placement; position it close to your source and avoid background noise. Use affordable acoustic treatment like blankets or foam panels to reduce echo and reverb in your space. These simple adjustments make a big difference, even without expensive gear. Experiment with microphone angles and room setup to find the best sound, ensuring your recordings are clearer and more professional.
What Are the Best DIY Methods for Soundproofing a Space?
Imagine your room as a drum, with sound bouncing around. To DIY soundproof, start with household barriers like heavy curtains, rugs, and bookshelves filled with items, acting as insulation. Use DIY insulation materials like foam or egg cartons on walls. Seal gaps around doors and windows with weatherstripping or tape. These simple steps create a barrier that muffles external noise, much like padding a drum to quiet its sound.
How Do I Reduce Background Noise During Recording?
To reduce background noise during recording, focus on strategic microphone placement—keep the mic close to your source and away from noise sources. Use ambient noise control by turning off or isolating fans, air conditioners, or any electronics that create sound. Additionally, consider using DIY sound barriers or blankets around your setup. These simple steps help capture cleaner audio without expensive equipment, making your recordings clearer and more professional.
What Are Cost-Effective Editing Tools for Audio Post-Production?
You can find cost-effective editing tools for audio post-production by exploring affordable plugins like ReaPlugs or TDR Nova, which are excellent for noise reduction and equalization. Open source software like Audacity is a great free option that offers essential editing features. These tools help you improve your audio quality without breaking the bank, making your project sound professional even on a tight budget.
How Can I Train My Team to Record Better Sound on a Budget?
Think of your team as skilled sailors steering the seas of sound. Teach them to master microphone positioning, ensuring each wave of sound is captured clearly. Emphasize understanding room acoustics—like tuning a vessel’s hull—to minimize unwanted echoes. Practice makes perfect, so set up regular training sessions and encourage hands-on experimentation. With patience and guidance, your crew will steer your recordings toward professional-quality results, even on a tight budget.
DIY soundproofing materials for recording
As an affiliate, we earn on qualifying purchases.
As an affiliate, we earn on qualifying purchases.
Conclusion
Mastering sound on a tight budget might seem impossible, but with these tips, you can create audio so clear, it’ll blow audiences away—like a professional studio in your pocket! Every crackle, hum, or muffled word you fix brings your project closer to perfection. Remember, great sound isn’t just about equipment; it’s about your passion and creativity. Keep experimenting, stay persistent, and your low-budget recordings will sound like million-dollar productions—proof that dedication beats dollars every time.
pop filter for microphones
As an affiliate, we earn on qualifying purchases.
As an affiliate, we earn on qualifying purchases.
AI noise reduction software for audio
As an affiliate, we earn on qualifying purchases.
As an affiliate, we earn on qualifying purchases.